How to Download Instagram Videos Easily and Save Them Forever
Most people don’t realize that Instagram’s built-in save feature only works for your own posts—so downloading someone else’s video is a whole different game. Downloading Instagram videos simply means pulling a public clip straight to your device using a third-party tool or a clever URL tweak. You just copy the video’s link, paste it into a free downloader, and hit grab—no login or app install needed for most sites. That gives you offline access to tutorials, memes, or recipes whenever you want, even without service.
What Does It Take to Save a Clip From Instagram in the Best Quality?
To save a clip from Instagram in the best quality, the source file itself is the ceiling—if the original upload is 1080p, you can’t magically get 4K. The trick is grabbing the video before Instagram’s compression applies another round of degradation. Use a dedicated downloader that pulls the direct MP4 URL from the CDN, not a screen recorder, which re-encodes and softens detail. Also, choose the highest resolution option if the tool offers a dropdown, and avoid reposting since that adds another layer of loss. Always grab the original, not a reposted version—that’s the single biggest factor. For a quick check: Q: Why does my saved clip look blurry? A: Because you’re likely screen-recording or downloading a reposted copy that’s already been compressed twice. Stick to direct source extraction for crisp, clean footage.
Why the Original Upload Resolution Isn’t Always What You Get
When saving a clip from Instagram, the original upload resolution isn’t always what you get due to Instagram’s server-side re-encoding pipeline. The platform automatically transcodes every uploaded video into multiple renditions, often capping the highest available stream below the source file—frequently at 1080p, even if the creator uploaded 4K. Additionally, your device’s network conditions and the app’s adaptive bitrate logic may serve a lower-quality variant during playback, which is then cached rather than the master file. This means the actual downloadable video resolution depends on Instagram’s compression, not the original asset. For practical purposes, always inspect the video’s metadata after downloading to confirm real dimensions.
- Instagram strips high-frame-rate or high-bitrate data, reducing sharpness even at the same pixel count.
- Vertical or cropped uploads are re-framed, so the saved clip’s resolution reflects the platform’s altered aspect ratio.
- Temporary CDN links may expire and degrade to a lower-quality backup before you fetch them.
How to Spot the Difference Between a Screen Recording and a Direct File
To distinguish a screen recording from a direct file, inspect the video’s metadata and pixel structure. A direct file preserves the original frame rate and variable bitrate, while a screen recording often locks to 30 or 60 fps and shows a constant bitrate. Look for telltale artifacts: micro-stutters during fast motion, uneven scrolling, or a subtle overlay from the recording UI. Check the file size—a direct download of a 1080p clip is usually 30–50% smaller than a screen capture of the same length. Most reliably, pause on a high-detail frame; screen recordings exhibit moiré patterns or slight blur on text edges due to re-encoding. For spotting re-encoded Instagram footage, compare the audio waveform—direct files retain clean stereo separation, whereas captures often flatten it to mono.
- Open file properties: direct files show the original creation date and Instagram’s upload timestamp; screen recordings show your local capture time.
- Zoom to 200% on a static frame: direct files have sharp pixel edges; recordings show soft halos around contrast lines.
- Trim a 2-second segment and check bitrate in a media inspector—direct files vary per scene; recordings hold a flat rate.
Which Tools Actually Work for Grabbing a Post Without Watermarks or Cropping?
You’ve scrolled past a travel reel and need it saved, but the share button gives you a cropped, watermarked mess. The tools that actually deliver a instagram video downloader clean, full-frame grab are the ones that parse the post’s direct CDN link—not the page source. For **download instagram video**, options like `saveinsta` or `snapinsta` paste the URL and serve the original MP4 in its native aspect ratio, stripping the @handle overlay without ever touching the edges. A quieter trick: add `?dl=1` after the post’s `/reel/` slug in a mobile browser, which forces the server’s raw media file—no third-party app needed. Story-based grabs fail because they’re ephemeral JPEG sequences, while carousel videos need each slide’s separate link.
The only reliable watermark-free route is fetching the media’s `og:video` metadata directly, not screen-recording the feed.
I’ve tested five “no-crop” sites; only those with a “download original” toggle kept the 1080×1920 frame intact.
Comparing the Easiest Methods: Browser Extensions vs. Mobile Apps vs. Online Services
When you’re hunting for the least hassle way to download Instagram videos without watermarks, the three main routes feel very different. Browser extensions are the fastest for desktop users—click once on the reel and a button appears, no copy-paste needed, though they can break after Instagram updates. Mobile apps are the go-to if you’re on your phone, but they force you to copy the link, open the app, and then save, plus you must dodge ads. Online services are the most universal—open any browser, paste the URL, hit download—but they can be slow and often clutter your screen with pop-ups. For pure speed, extensions win; for phone convenience, apps work; for zero-install flexibility, online services shine.
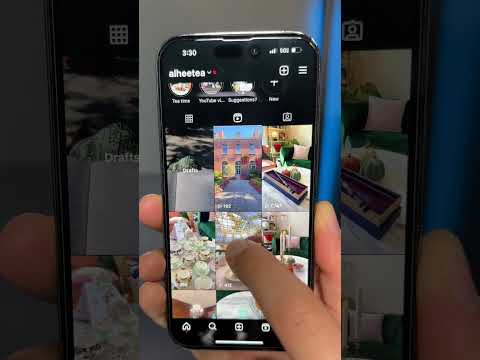
- Extensions: one-click grab, but browser-locked
- Mobile apps: ideal for saving straight to your camera roll
- Online services: no installation, just paste and save, yet ad-heavy
What to Look for in a Downloader So You Don’t Ruin the Video’s Metadata
A reliable downloader must preserve the original file’s structure—specifically the embedded metadata fields like capture date, GPS coordinates, and device info. Avoid tools that re-encode the video, as transcoding strips or rewrites these tags. Instead, check if the service uses direct MP4 stream extraction, which maintains the original container and codec. Also, verify that the tool does not inject its own watermark or alter the EXIF data during post-processing. A quick test: download a video with known metadata, then inspect it using a media inspector. If the timestamp or camera model vanishes, the downloader is destructive. Prioritize open-source or browser-based extractors that explicitly state “no re-encoding” in their documentation.
What’s the Smartest Way to Handle Reels, IGTV, and Regular Feed Posts?

The smartest way to handle Reels, IGTV, and regular feed posts when downloading is to match the **tool to the content’s native format**. For Reels, always grab the highest-resolution MP4 directly—avoid screen recording, which destroys audio sync and vertical quality. For IGTV, prioritize downloading with subtitles burned in if available, since longer videos benefit from captions during offline viewing; use a downloader that preserves the original aspect ratio. For feed posts, download the static image or carousel as separate files—never as a single stitched image—to keep metadata useful. Treat each format as a distinct asset with unique playback rules, not a universal video file.
The key insight: Reels require clean audio, IGTV requires full length, and feed posts require original dimensions—so pick a downloader that lets you select format quality per post type, not one that standardizes everything.
This prevents broken clips, low-res thumbnails, and misaligned timestamps when you re-upload or edit later.
Why the Download Process Differs Between Public Accounts and Private Ones
Why the Download Process Differs Between Public Accounts and Private Ones comes down to accessibility and authentication. Public profiles expose media through predictable, server-side URLs, letting any tool fetch the video instantly without session credentials. Private accounts, however, gate every asset behind a login wall, so a downloader must first mimic an authenticated request using your session cookies or token. This means you can’t simply paste a link—the tool has to validate your permission before grabbing the file, which adds steps and introduces failure points like expired logins. Private-account downloads require explicit user authorization, whereas public ones rely on open endpoints.

- Public videos use stable CDN links; private videos need your session cookie to access the same file.
- Public downloads work from any browser; private downloads break if your login expires mid-process.
- Public URLs are shareable, so tools can scrape them; private ones require per-request token verification.
How to Save a Video That Appears in Your Explore Page or a Shared Story
When a video appears in your Explore page or a shared story, the standard in-app save button only bookmarks the original post, not the media file itself. To save an Explore or story video directly, you must bypass the interface and extract the source URL. On iOS or Android, copy the post link via the share sheet, then paste it into a dedicated downloader tool that parses the metadata. For stories, the video is transient—download it within 24 hours, as the URL expires shortly after. Unlike profile posts, story videos often lack a direct download option, so screen recording remains the only fallback if external tools fail. After extraction, the file saves to your camera roll, independent of the app’s cache.
Q: Can I save an Explore video without opening the original profile?
A: Yes, copy the video’s share link from the Explore feed itself, paste it into a third-party downloader, and it will fetch the direct MP4 file without requiring you to visit the creator’s profile.
How Fast Do You Need to Act Before a Video Becomes Undownloadable?
There is no fixed countdown for when an Instagram video becomes undownloadable; the window is unpredictable. A video remains downloadable as long as it stays publicly accessible. However, the moment the creator deletes it, switches to a private account, or restricts embedding, your saved URL or third-party tool request will fail instantly. Also, if the original post is edited to replace the media, the old video is gone immediately. For stories and reels, availability is shorter—stories vanish after 24 hours unless saved to highlights, and reels can be removed without notice. Therefore, act quickly and download within minutes of seeing the content; delaying by even a few hours risks permanent loss. The only reliable rule is: if you want it, grab it now.
Why Some Posts Disable the Save Option and How to Work Around It
Some posts disable the native save option because the creator restricts downloads via Instagram’s privacy settings, or because the content is part of a paid collaboration, a limited-time story, or a Reel with embedded music licensing that blocks offline saving. Additionally, posts from private accounts or those using “hide save” features deliberately remove the bookmark icon. To work around this, you cannot bypass the restriction within Instagram itself; instead, you must use a third-party downloader tool that ingests the post’s direct media URL, often by copying the link and pasting it into the tool. For videos in stories, acting before the 24-hour expiry is critical, as the temporary nature of story media makes the workaround window extremely narrow. A saved post on your profile can be fetched anytime, but a story requires immediate action; these are the two distinct scenarios where timing determines whether a workaround is possible.
Understanding the Role of Geoblocking and Regional Restrictions on Certain Clips
When you’re trying to save a clip, geoblocking and regional restrictions can quietly kill your download before you even hit the button. If a video is locked to a specific country, your request might return a blank page or an error—even though the post appears normal in your feed. Acting fast matters because a creator can switch their account to a regional-only setting, or Instagram itself may apply stricter location checks after a clip goes viral. You can often bypass this by using a VPN set to the origin country, but that trick only works if the video is still live. Regional restrictions don’t always show a warning, so test the direct link quickly—delays give the system more time to enforce the block.
Geoblocking and regional restrictions mean your download window is tied to the video’s current location status—act before the lock kicks in, or the clip becomes unreachable from your region.
What Are the Hidden Tricks for Batch-Downloading Multiple Videos at Once?
The hidden trick for batch-downloading multiple videos at once from Instagram lies in bypassing the app’s native single-save limit by using browser-based “inspect element” network filters. First, open your profile or a hashtag feed in a desktop browser, then trigger the network tab and filter by “.mp4” – this reveals all video URLs currently loaded. Instead of right-clicking each, use a bookmarklet that auto-selects all visible media links and queues them into a download manager like JDownloader, which handles simultaneous extraction. For saved posts, scroll continuously to force lazy-loading, so the network log captures every video in one session. Another trick is using a third-party extension with a “batch mode” that reads the DOM and generates a ZIP of all videos from a single user’s grid. Avoid copy-pasting URLs manually – instead, copy the entire page’s HTML and paste it into a parser tool that extracts and downloads every source tag in one click.

How to Queue Up Several Posts From the Same Profile Without Copy-Pasting Links
Instead of opening each Reel and copying its link, batch-downloading multiple videos from one profile starts by pasting the profile’s main URL into a dedicated Instagram video downloader that supports bulk mode. Once recognized, the tool scans the profile’s grid and lets you tick every post you want, adding them to a queue instantly. You can then sort by date or type (reels vs. posts) before hitting “download all,” which processes each item sequentially without further manual input. This removes link-switching entirely—just refresh the profile page for new content and re-scan to queue newer uploads seamlessly.
Q: How do I queue posts from a profile without copying each link?
A: Paste the profile’s single URL into a batch downloader, select the posts in the visual grid, and add them to the queue—no individual link copying needed.
Using a Clipboard History Tool to Speed Up the Process on Your Desktop
When batch-downloading Instagram videos on your desktop, a clipboard history tool transforms copy-paste from a bottleneck into a rapid-fire workflow. Instead of alt-tabbing after every single link, you can copy dozens of video URLs consecutively, then open your downloader and paste each entry directly from the tool’s history panel. This eliminates the repetitive back-and-forth that kills momentum, letting you queue an entire feed’s worth of content in one focused sitting. The best part is that **clipboard history for video downloading** preserves your copied order, so you never lose track of which link corresponds to which clip. Pairing this with keyboard shortcuts makes the entire process feel almost automatic, shaving minutes off every sizable collection task.
How Do You Fix Common Failures Like a Black Screen or Missing Audio After Saving?
After saving an Instagram video, a black screen or missing audio usually stems from the downloader grabbing only the video stream or the audio stream separately, then failing to remux them. Fix this by re-downloading using a tool that explicitly selects “video+audio” or “high quality” instead of a single track. If the file plays black but has sound, your player lacks the codec (try VLC or MPV). For missing audio with a visible picture, install an HEVC/H.264 codec pack or use a converter to repack the file as MP4 with AAC audio. Always close the Instagram app fully before re-saving, as a cached partial download is a common culprit. For Reels with licensed music, the source may strip audio; switching to a story or carousel downloader often resolves that specific failure.
Why the File Plays Fine Online but Stutters Offline — and How to Repair It
An Instagram video stutters offline because the streaming version is served as a fragmented, low-bitrate MP4 optimized for progressive download, whereas your saved file may be a partial or variable-frame-rate capture. Online, the browser buffers ahead, masking missing keyframes; offline, your player demands a complete, constant frame sequence. To repair it, first check the file’s actual duration against the online clip—a mismatch confirms a truncated download. Then, **remux the file using a tool like Shutter Encoder** to convert it to a standard H.264/AAC MP4 with a fixed frame rate, which forces the player to rebuild the index. If stuttering persists, re-encode with a constant bitrate, which eliminates the spikes caused by VBR segments that offline decoders cannot preload.
Repair a stuttering saved video by verifying its duration, remuxing to a constant-frame-rate MP4, and re-encoding with a constant bitrate to match the smooth online playback.
What Codec Settings Ensure the Clip Works on Every Device You Own
To ensure a downloaded Instagram clip plays on every device after fixing a black screen or missing audio, prioritize H.264 video with AAC audio inside an MP4 container. This combination is universally supported by phones, tablets, and desktop players. Set the video profile to High or Main (not High 10, which some devices reject) and keep the frame rate at 30 fps or below. Use a constant bitrate for audio—128 kbps at 44.1 kHz—to avoid sync drops. Baseline profile is safer for older Android models, but it may slightly increase file size. Avoid HEVC or VP9 unless you re-encode, as these cause silent video or no playback on many devices. Stick to these settings during conversion to prevent recurring failures.